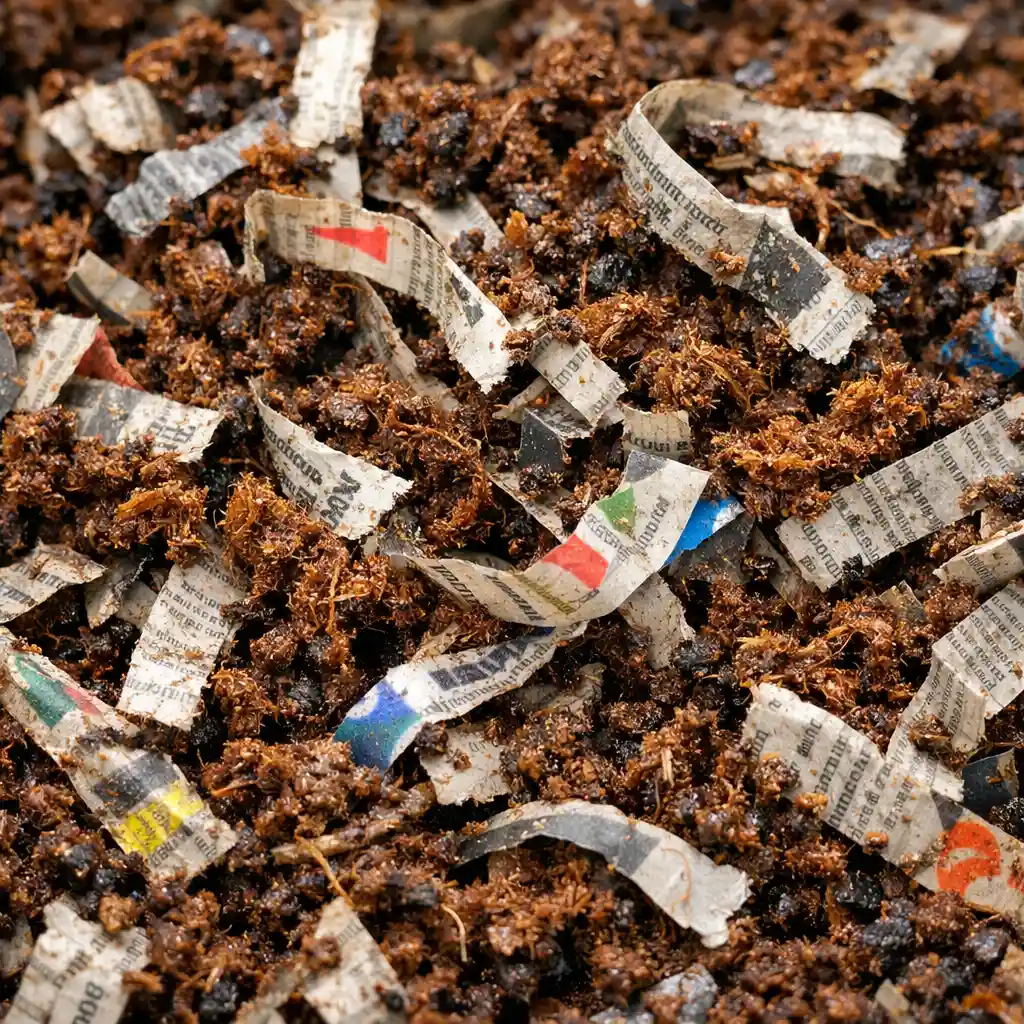
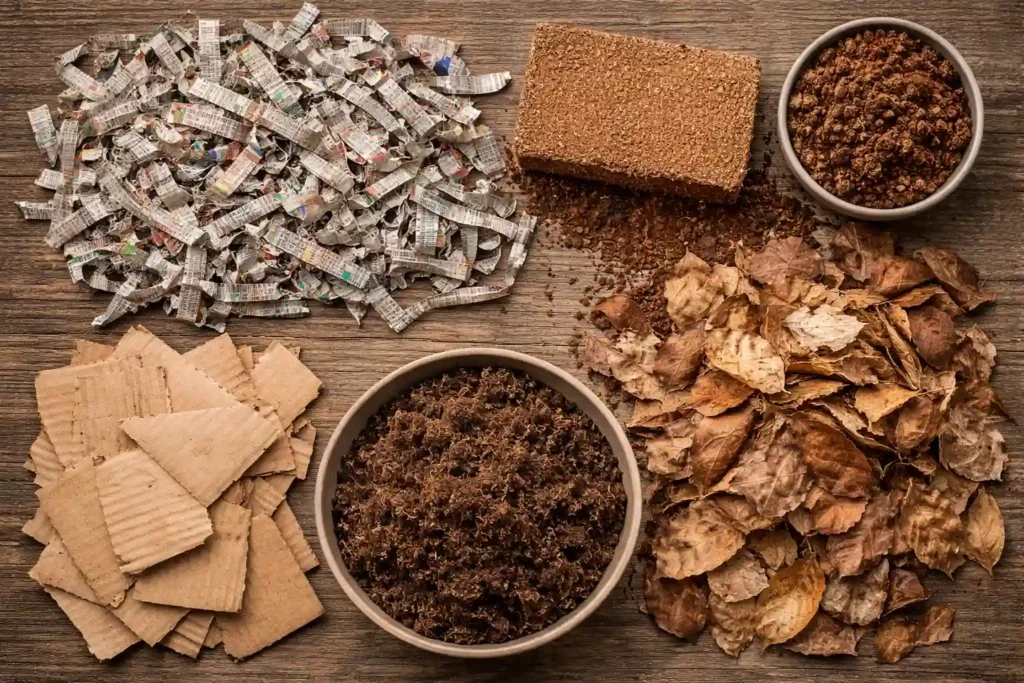
![Most worm bin failures aren't caused by bad worms — they're caused by bad bedding. Get the moisture wrong, use the wrong materials, or pack things too tightly, and your red wigglers will struggle from day one. Learning how to make worm bedding at home correctly takes less than 20 minutes, and in this guide you'll master exactly two things: which materials to use and how to prepare them the right way. [ALT: Close-up of fluffy, moist worm bin bedding made from shredded newspaper strips and coco coir] What Is Worm Bedding and Why Does It Matter? Worm bedding isn't just filler. It's your worm's home, moisture regulator, and carbon source all rolled into one. Red wigglers (Eisenia fetida) — the go-to composting worm — breathe through their skin, which means bedding moisture is a life-or-death detail. It should always feel like a wrung-out sponge: consistently damp, never dripping. Bedding also balances your bin. Food scraps are the "green" (nitrogen) side. Bedding is the "brown" (carbon) side. You need both for a healthy, odor-free bin. Quick tip: If your worm bin smells bad, your bedding is usually the problem — too wet, too little of it, or not enough carbon material. [INTERNAL LINK: How to Set Up a Worm Composting Bin] Best Materials for Making Worm Bedding at Home Here's what most guides miss: you have real options, and blending them is always better than using just one. Shredded newspaper — Free and accessible. Tear into 1-inch strips. Skip glossy or colored ink pages. Downside: breaks down quickly and needs refreshing more often. Corrugated cardboard — A worm favorite. Remove tape and coatings, tear into palm-sized pieces, and soak briefly. Doubles perfectly as a top cover layer. Coconut coir (coco coir) — The gold standard. pH-neutral, mold-resistant, and holds moisture without getting soggy. Comes in compressed bricks — just expand with water. Aged leaves or leaf litter — Free from your backyard. Use dry, crumbled leaves (not fresh green ones) and mix with newspaper for best results. Peat moss — Good moisture retention but slightly acidic. Use sparingly as a 20–30% blend ingredient, never as your primary bedding. Avoid: Glossy paper, synthetic materials, treated wood shavings (cedar and pine are toxic to worms), and fresh grass clippings alone. [ALT: Flat lay of worm bedding materials — newspaper strips, coco coir brick, cardboard pieces, dried leaves, peat moss] The Bedding Blend Formula (Most Guides Skip This) The best vermicomposting bedding isn't a single material — it's a balanced mix. Here's the beginner blend to follow: 50% shredded newspaper or cardboard (structure and carbon) 30% coco coir, pre-moistened (moisture stability) 20% aged leaves or garden soil (grit and beneficial microbes) The newspaper provides carbon and air pockets. The coco coir locks in the right moisture level. The soil introduces microbes that help worms acclimate faster and kick-start decomposition. This blend is more stable and far more forgiving than newspaper alone. Pro tip: Add a small handful of finished compost to the fresh bedding to jump-start microbial activity right away. Step-by-Step: How to Make Worm Bedding at Home Step 1: Gather your materials — shredded newspaper or cardboard, coco coir, aged leaves or garden soil, and a spray bottle with water. Step 2: Shred and prepare — Tear newspaper into 1-inch strips. Break cardboard into palm-sized pieces and remove any tape. Expand coco coir in a bucket of water until fully hydrated. Step 3: Check and adjust moisture — Squeeze a handful. A few drops should fall — not a stream. Too wet? Add dry material and fluff. Too dry? Spray lightly and remix. Step 4: Mix your bedding blend — Combine using the 50/30/20 formula. Keep it loose and airy, 4–6 inches deep. Never pack it down — worms need oxygen just as much as moisture. Step 5: Add a cardboard top layer — Place a flat, damp piece of cardboard directly on top. It holds moisture, blocks out light (worms hate light), and breaks down as an extra food source. Step 6: Let it rest 24–48 hours before adding worms — This allows chlorine from tap water to off-gas and gives beneficial microbes time to activate. Almost no guide mentions this step — but it makes a real difference in how quickly worms settle in. [ALT: Six-step collage — shredding newspaper, soaking coir, squeezing moisture test, mixing blend, fluffing in bin, placing cardboard cover] How to Know Your Bedding Is Ready for Worms Before adding your red wigglers, confirm the following: the bedding smells earthy and neutral (not sour or chemical), it feels evenly damp throughout, there are visible air pockets when you fluff it, and the temperature has settled to room temperature. If it smells sour, add dry carbon material and fluff. If it's bone dry, spray lightly and recheck after 30 minutes. Small patches of white mold are normal — just mix them in. Excessive mold means it's too wet: add dry bedding and reduce moisture. Common Bedding Mistakes to Avoid Making it too wet — Bedding should never drip freely. This is the #1 new bin killer. Packing it too tightly — Worms breathe; air pockets aren't optional. Using only one material — Single-material bedding breaks down unevenly. Adding food before bedding is established — Wait at least one week before feeding. Using tap water without letting it sit — Chlorine stresses worms. Let it rest an hour or use rainwater. Too much food, not enough bedding — If your bin smells, double the bedding before you reduce food. Maintaining and Refreshing Your Worm Bedding Over Time Bedding naturally shrinks as worms consume it. Add fresh bedding every 2–4 weeks to keep the environment stable. When bedding is nearly gone, it's time to harvest your vermicompost and start fresh. Use the migration method: add fresh bedding to one side of the bin and bury food there for 2–3 weeks. Worms migrate toward the food, leaving finished worm castings on the original side — ready to harvest. Any liquid draining from the bottom of the bin is "worm tea" — a potent liquid fertilizer. Don't discard it. [INTERNAL LINK: How to Harvest Vermicompost at Home] Conclusion Great worm bedding comes down to one blend and one test: the right mix of materials, and the wrung-out sponge moisture check. Get those two right, and your worms will handle everything else. Don't overthink your first attempt — red wigglers are forgiving once the basics are in place. Ready to start? A coco coir brick and a few pages of old newspaper are all you need — your bedding can be ready in under 20 minutes. Once your bin is set up, explore what to feed your worms next. Your garden will thank you for it.](https://wormhelp.com/wp-content/uploads/2026/03/DIY-worm-bedding-made-from-shredded-cardboard-and-newspaper-in-a-home-bin.webp)
Most worm bin failures aren’t caused by bad worms – they’re caused by bad bedding. Get the moisture wrong, use the wrong materials, or pack things too tightly, and your red wigglers will struggle from day one.
Learning how to make worm bedding at home correctly takes less than 20 minutes, and in this guide you’ll master exactly two things: which materials to use and how to prepare them the right way.
What Is Worm Bedding and Why Does It Matter?
Worm bedding isn’t just filler. It’s your worm’s home, moisture regulator, and carbon source all rolled into one. Red wigglers (Eisenia fetida) — the go-to composting worm — breathe through their skin, which means bedding moisture is a life-or-death detail. It should always feel like a wrung-out sponge: consistently damp, never dripping.
Bedding also balances your bin. Food scraps are the “green” (nitrogen) side. Bedding is the “brown” (carbon) side. You need both for a healthy, odor-free bin.
Quick tip: If your worm bin smells bad, your bedding is usually the problem – too wet, too little of it, or not enough carbon material.
Also Read: 4 Best Worms For Vermicomposting
Best Materials for Making Worm Bedding at Home
Here’s what most guides miss: you have real options, and blending them is always better than using just one.
- Shredded newspaper — Free and accessible. Tear into 1-inch strips. Skip glossy or colored ink pages. Downside: breaks down quickly and needs refreshing more often.
- Corrugated cardboard — A worm favorite. Remove tape and coatings, tear into palm-sized pieces, and soak briefly. Doubles perfectly as a top cover layer.
- Coconut coir (coco coir) — The gold standard. pH-neutral, mold-resistant, and holds moisture without getting soggy. Comes in compressed bricks — just expand with water.
- Aged leaves or leaf litter — Free from your backyard. Use dry, crumbled leaves (not fresh green ones) and mix with newspaper for best results.
- Dry Neem and Mango Leaves or Sugarcane Bagasse — Skip the expensive imported materials. Dry leaves from local trees like Neem act as a natural pest deterrent in the bin. If you live near a juice stall, dried sugarcane bagasse is an incredible, free source of aeration that creates perfect “oxygen chimneys” in your bedding.
- Avoid: Glossy paper, synthetic materials, treated wood shavings (cedar and pine are toxic to worms), and fresh grass clippings alone.
The Bedding Blend Formula (Most Guides Skip This)
The best vermicomposting bedding isn’t a single material — it’s a balanced mix. Here’s the beginner blend to follow:
- 50% shredded newspaper or cardboard (structure and carbon)
- 30% coco coir, pre-moistened (moisture stability)
- 20% aged leaves or garden soil (grit and beneficial microbes)
The newspaper provides carbon and air pockets. The coco coir locks in the right moisture level. The soil introduces microbes that help worms acclimate faster and kick-start decomposition. This blend is more stable and far more forgiving than newspaper alone.
Pro tip: Add a small handful of finished compost to the fresh bedding to jump-start microbial activity right away.
Step-by-Step: How to Make Worm Bedding at Home
Step 1: Gather your materials
Shredded newspaper or cardboard, coco coir, aged leaves or garden soil, and a spray bottle with water.
Step 2: Shred and prepare
Tear newspaper into 1-inch strips. Break cardboard into palm-sized pieces and remove any tape. Expand coco coir in a bucket of water until fully hydrated.
Step 3: Check and adjust moisture
Squeeze a handful. A few drops should fall — not a stream. Too wet? Add dry material and fluff. Too dry? Spray lightly and remix.
Step 4: Mix your bedding blend
Combine using the 50/30/20 formula. Keep it loose and airy, 4–6 inches deep. Never pack it down — worms need oxygen just as much as moisture.
Step 5: Add a cardboard top layer
Place a flat, damp piece of cardboard directly on top. It holds moisture, blocks out light (worms hate light), and breaks down as an extra food source.
Step 6: Let it rest 24–48 hours before adding worms
This allows chlorine from tap water to off-gas and gives beneficial microbes time to activate. Almost no guide mentions this step — but it makes a real difference in how quickly worms settle in.
How to Know Your Bedding is Ready for Worms
Before adding your red wigglers, confirm the following: the bedding smells earthy and neutral (not sour or chemical), it feels evenly damp throughout, there are visible air pockets when you fluff it, and the temperature has settled to room temperature.
If it smells sour, add dry carbon material and fluff. If it’s bone dry, spray lightly and recheck after 30 minutes. Small patches of white mold are normal — just mix them in. Excessive mold means it’s too wet: add dry bedding and reduce moisture.
Consistently wet and acidic bedding doesn’t just harm red wigglers; it can also trigger a population explosion of tiny white pests. If you notice these invaders, refer to our guide on how to identify and fix pot worms to restore balance.
Common Bedding Mistakes to Avoid
- Making it too wet — Bedding should never drip freely. This is the #1 new bin killer.
- Packing it too tightly — Worms breathe; air pockets aren’t optional.
- Using only one material — Single-material bedding breaks down unevenly.
- Adding food before bedding is established — Wait at least one week before feeding.
- Using tap water without letting it sit — Chlorine stresses worms. Let it rest an hour or use rainwater.
- Too much food, not enough bedding — If your bin smells, double the bedding before you reduce food.
Maintaining and Refreshing Your Worm Bedding Over Time
Bedding naturally shrinks as worms consume it. Add fresh bedding every 2–4 weeks to keep the environment stable. When bedding is nearly gone, it’s time to harvest your vermicompost and start fresh.
Use the migration method: add fresh bedding to one side of the bin and bury food there for 2–3 weeks. Worms migrate toward the food, leaving finished worm castings on the original side — ready to harvest. Any liquid draining from the bottom of the bin is “worm tea” — a potent liquid fertilizer. Don’t discard it.
Conclusion
Great worm bedding comes down to one blend and one test: the right mix of materials, and the wrung-out sponge moisture check.
Get those two right, and your worms will handle everything else. Don’t overthink your first attempt — red wigglers are forgiving once the basics are in place.
Ready to start? A coco coir brick and a few pages of old newspaper are all you need — your bedding can be ready in under 20 minutes. Once your bin is set up, explore what to feed your worms next. Your garden will thank you for it.
Leave a Comment